




Professional photographers take entire courses dedicated to lighting.
Natural light, studio light, full sun, indoors, flash…the list goes on! You can wade chest deep into the world of light and how to use it in photography and STILL have an entire ocean left to explore. It can be a touch overwhelming, to say the least.
There is so much information and so many opinions on lighting in photography because of the endless ways you can use it to create a certain style for your images. The right lighting can add that glowy magic to an image, drawing you in to the moment. The light just before sunset (golden hour!) can add a touch of romance, softness or the oh-so-coveted sun flare. The gentle light from a south facing window can sit perfectly on your baby’s face as your take their first newborn photos. Morning sun can give the colors in your garden a bright, saturated quality that fades by midday. Noon sun can result in harsh, artistic lines.
Light is everything.
My goal with this chapter is to simplify this massive topic into a handful of easy, actionable tips that will help you capture your cubs in a more *ahem* illuminated way. Read on to learn how to use natural light to your advantage without becoming overwhelmed by the infinite possibilities.
Types of Lighting
First, let’s start with the three basic lighting scenarios you’ll run into when photographing your kids: Diffused, harsh sunlight and backlight. Most of my photos and tips in this series revolve around diffused light because it’s what I enjoy shooting the most. Diffused light is when there is a “filter” between your subject and the sun —clouds, shade, under or in a structure (like a porch, dock, house), a curtain, etc. This type of lighting is soft and makes it easy to capture moments in time without worrying too much about posing to avoid the harsher lighting scenarios.

5 Tips for Using Natural Light in Your Photography:
 1. Wait for the Right Light
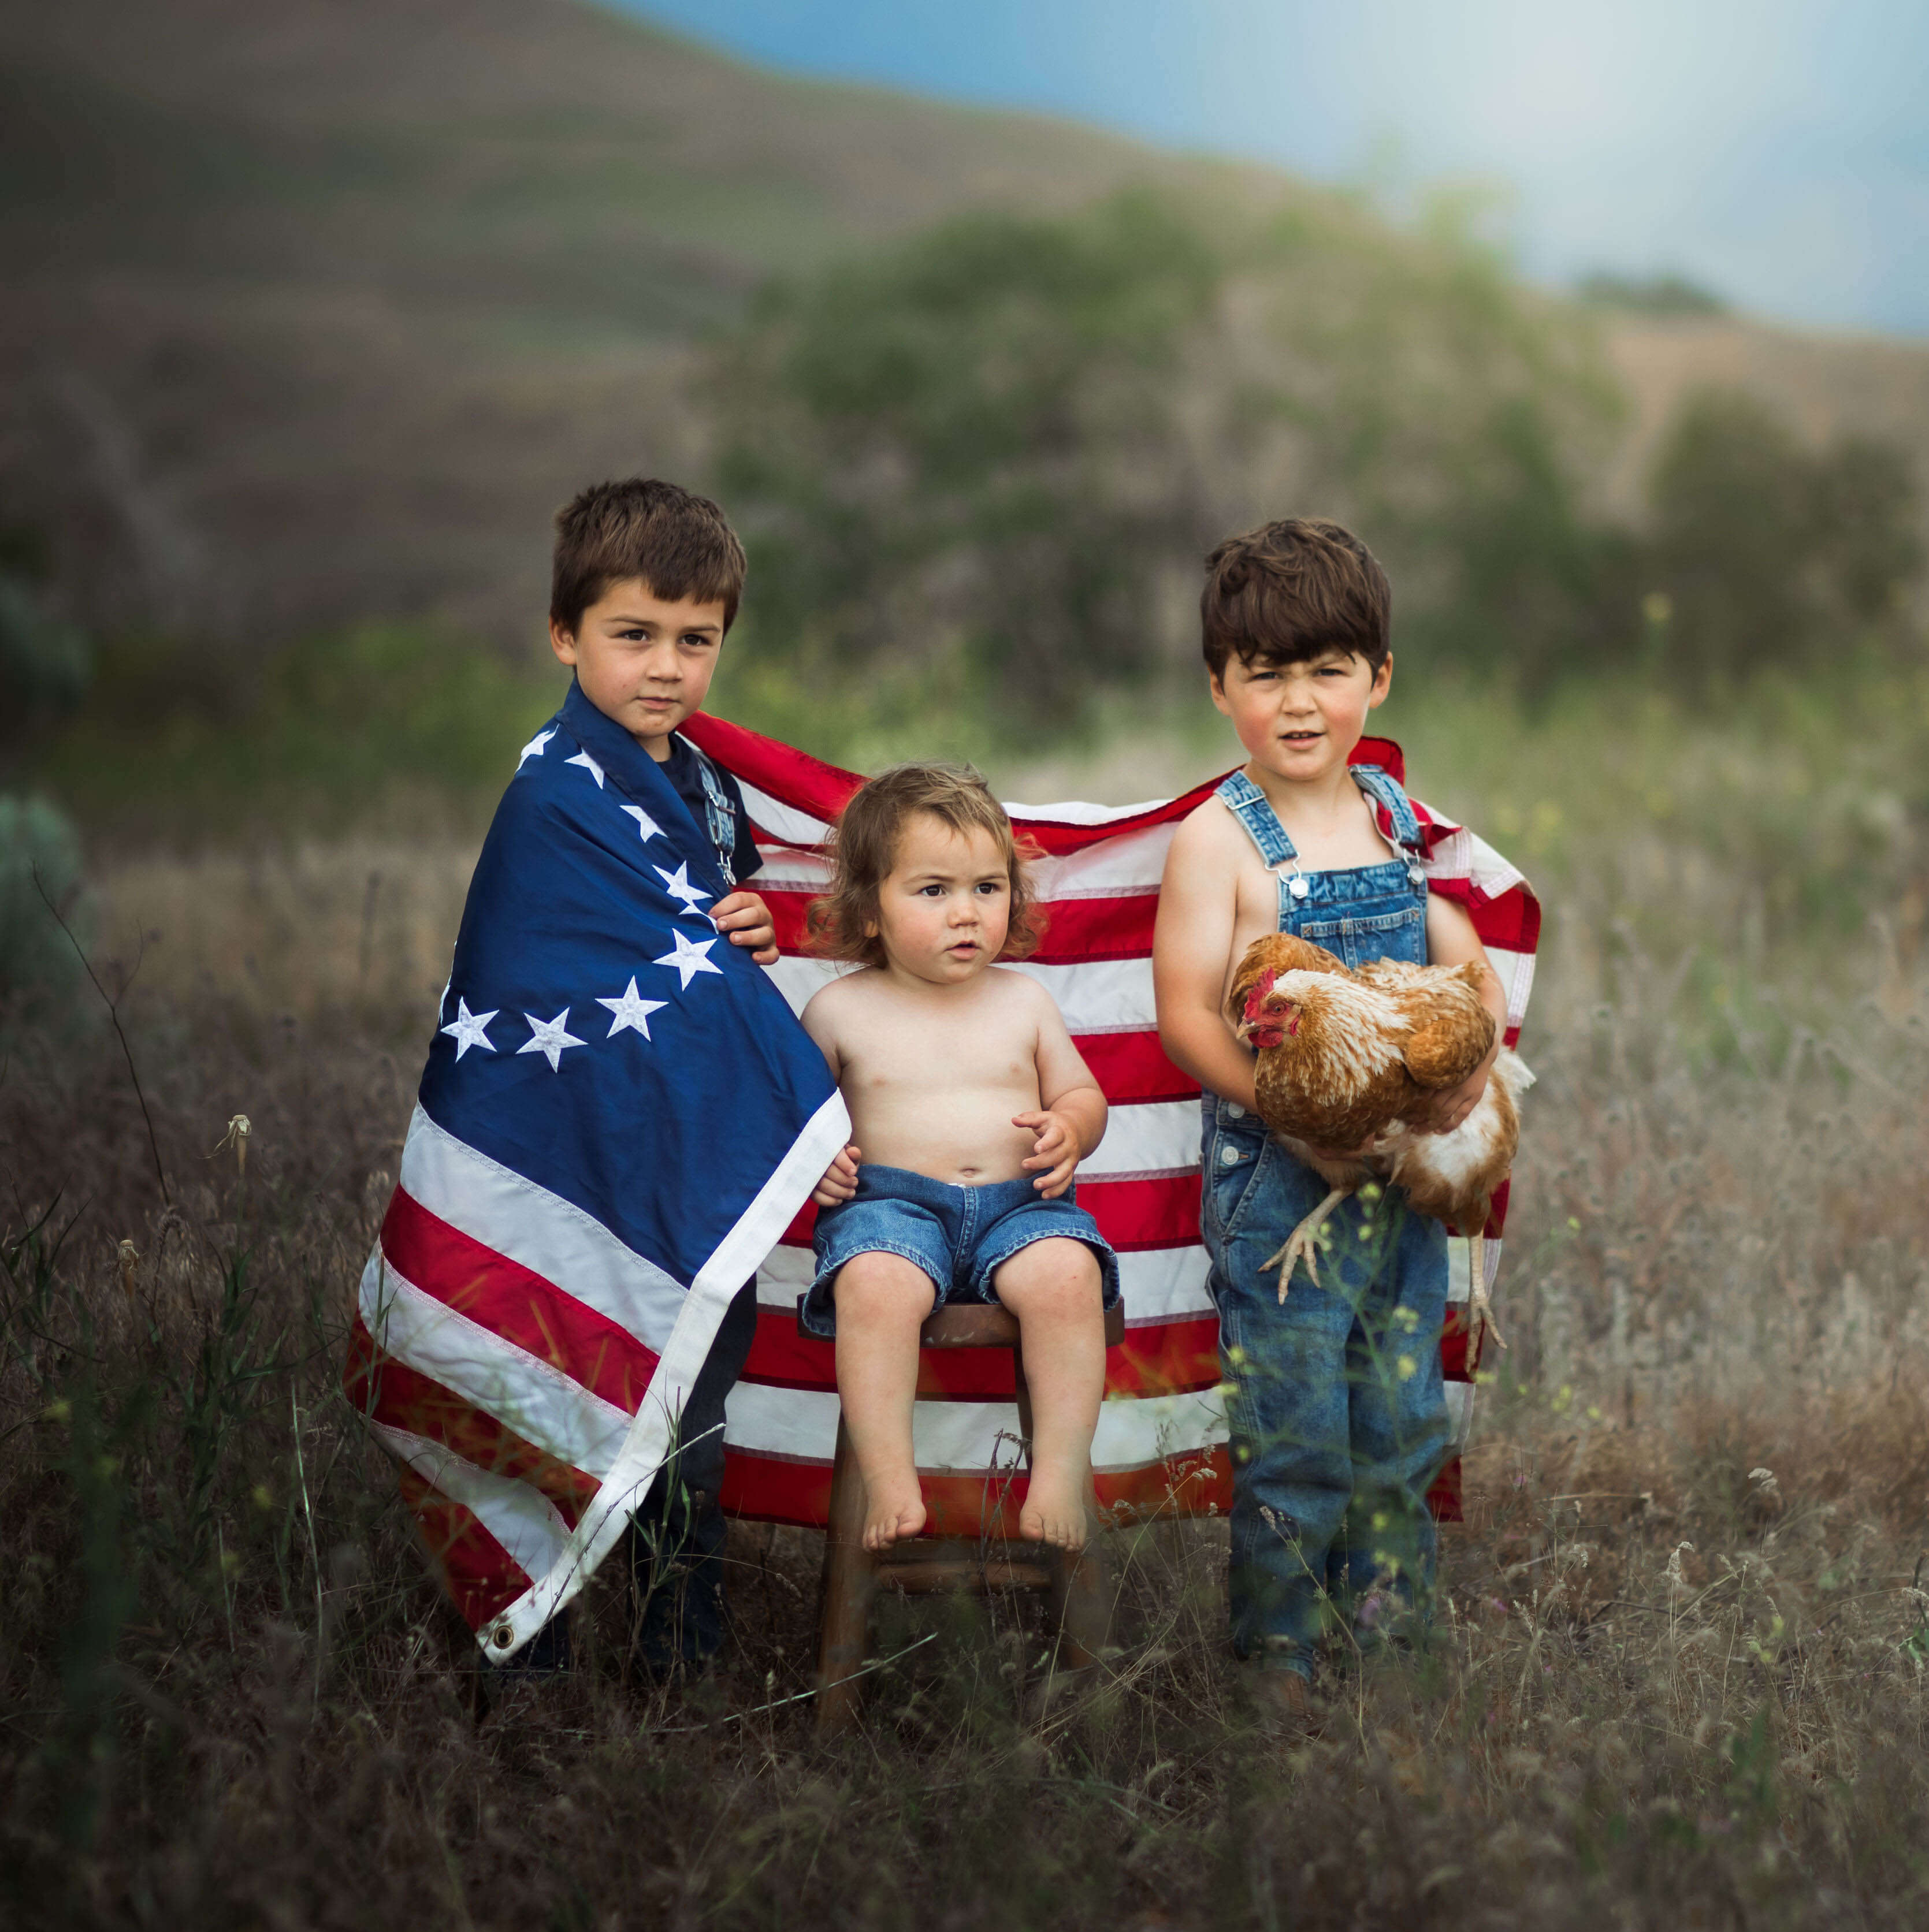
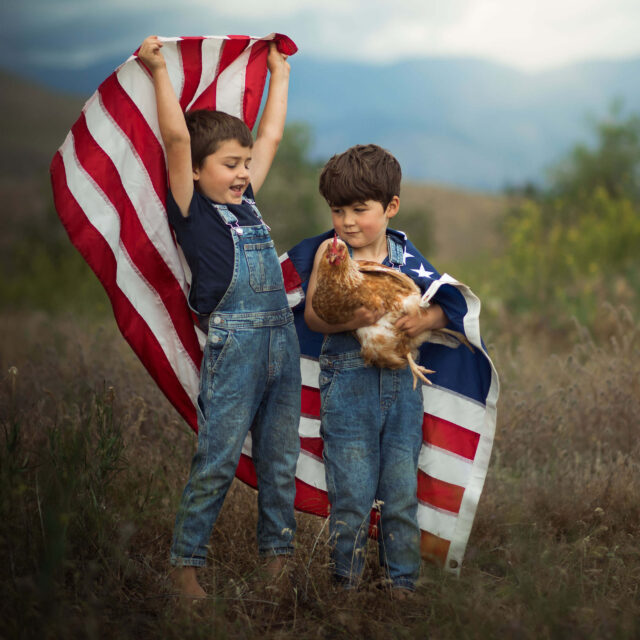
This is the simplest advice I can give, and yet SO important. Being patient and planning a shoot for soft, evening light can change everything for your photo. When I have an idea in my head and I’m so excited about the photos, the last thing I want to do is put it off for several hours (or even worse, several days!) which comes up if I’m waiting for an overcast sky. However, it truly pays off to wait for the right lighting.
This photo I took of the boys for 4th of July is a great example of this tip. I’d had the idea for this photo in my head for a couple weeks, but sunset was very late at this point (like 9:00-9:30 ish) and I couldn’t keep the boys up that late without paying for it the next day. So when an intense summer storm came through, I was SO happy to see those moody clouds and knew it was the perfect time to make this image a reality.
 2. Avoid Harsh Lines
Sometimes you don’t have the luxury of waiting until the sun is lower in the sky — you are on an adventure and want to capture it NOW. In that case, do your best to keep harsh lines/light off your child’s face. Squinty eyes or big, dark shadows can detract from an image and distract from the sweetness you are trying to capture! Try the “Palm of your hand” trick! A Quick and easy way to see what direction would be best is to hold your hand up, palm facing you. Slowly turn in a circle and watch how the shadows & light fall. There will be directions where your hand is well lit, shadowed, or half shadow and half light. This is such a good trick when you are in a tough lighting situation and want to do your best to make their skin glow!
 3. Utilize Windows
If you are inside, try to utilize natural light by staging your photos by windows or glass doors. The most important thing to me is the catchlight in their eyes. In this photo, the window is behind me and they are facing it, bathing their skin in soft light and adding a beautiful glow to Wilder’s eyes for this Valentines day shoot. Pro tip: Use soft, semi-transparent curtains to diffuse light in your home!
 4. Use Light From One Direction
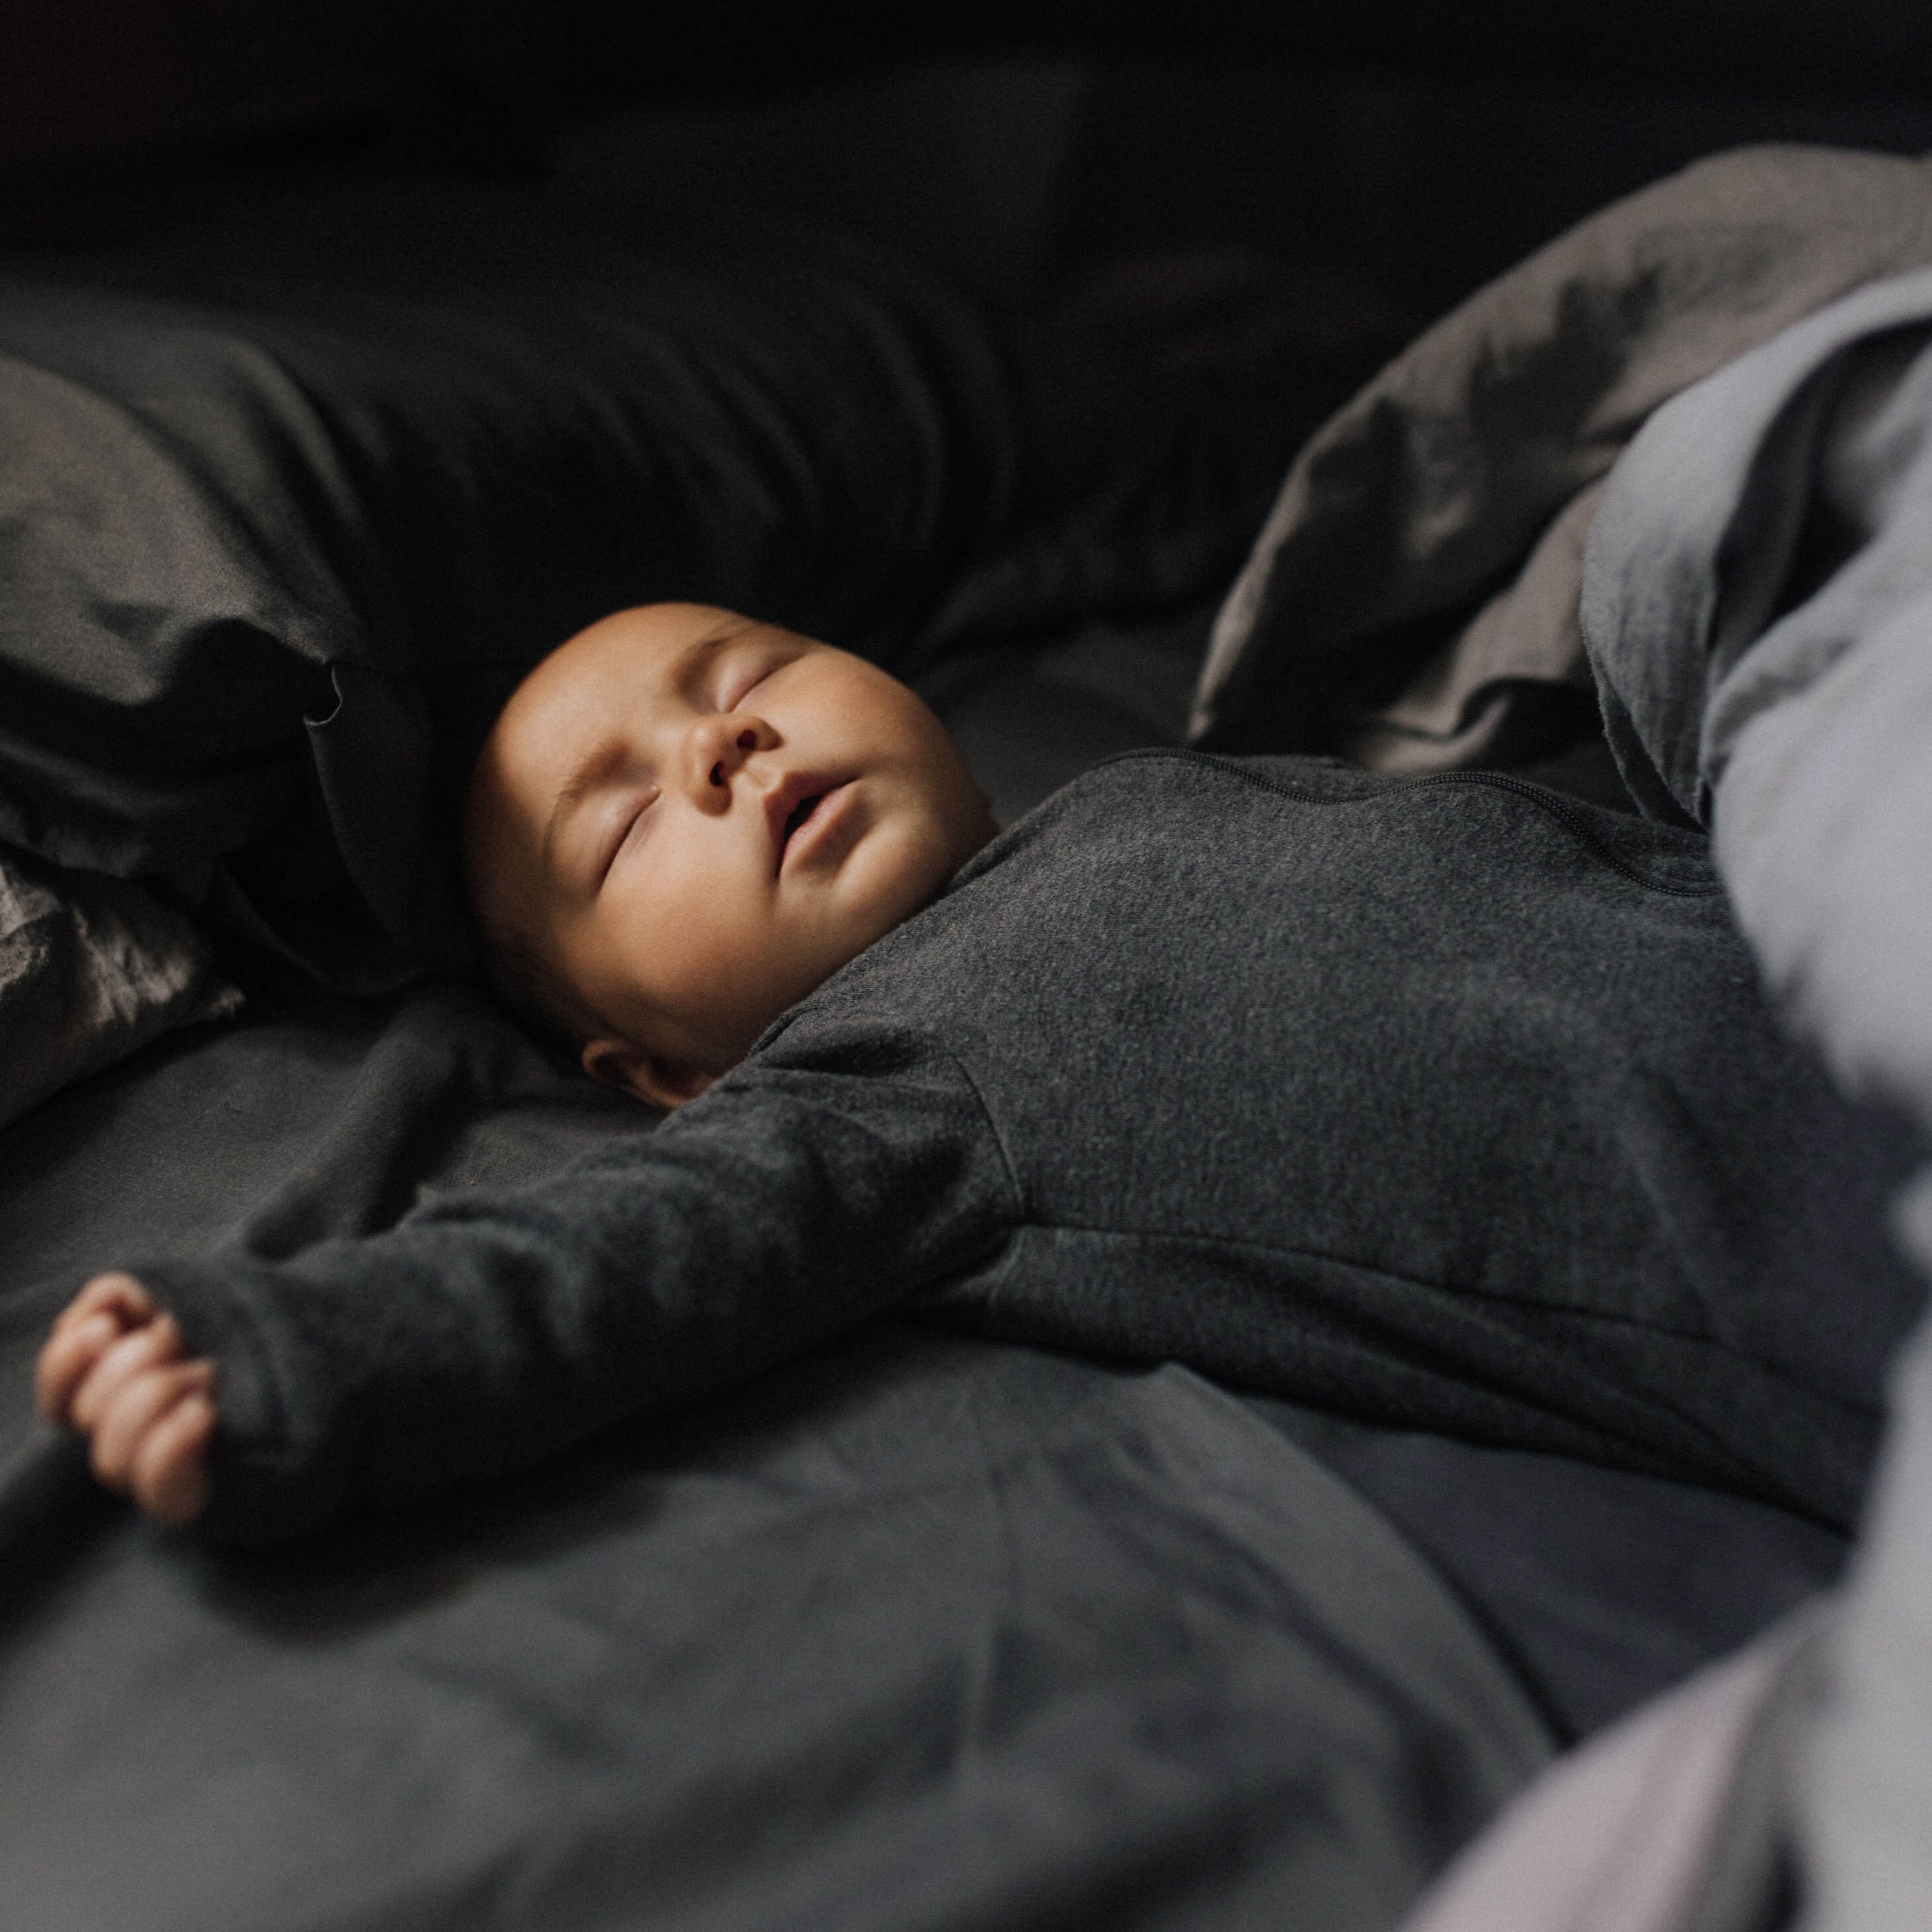
There was only one light source (our bedroom window) for this photo of Wilder sleeping. I LOVE depth that light from a single angle can give— you can see the light gently fade to shadow on his face, and it gives the bedding so much extra texture and richness. The reason I could do this without it being too harsh is because it was filtered light, AKA ambient light from the sun that wasn’t directly coming through the window.
 5. Partly Cloudy Days are Your Friend
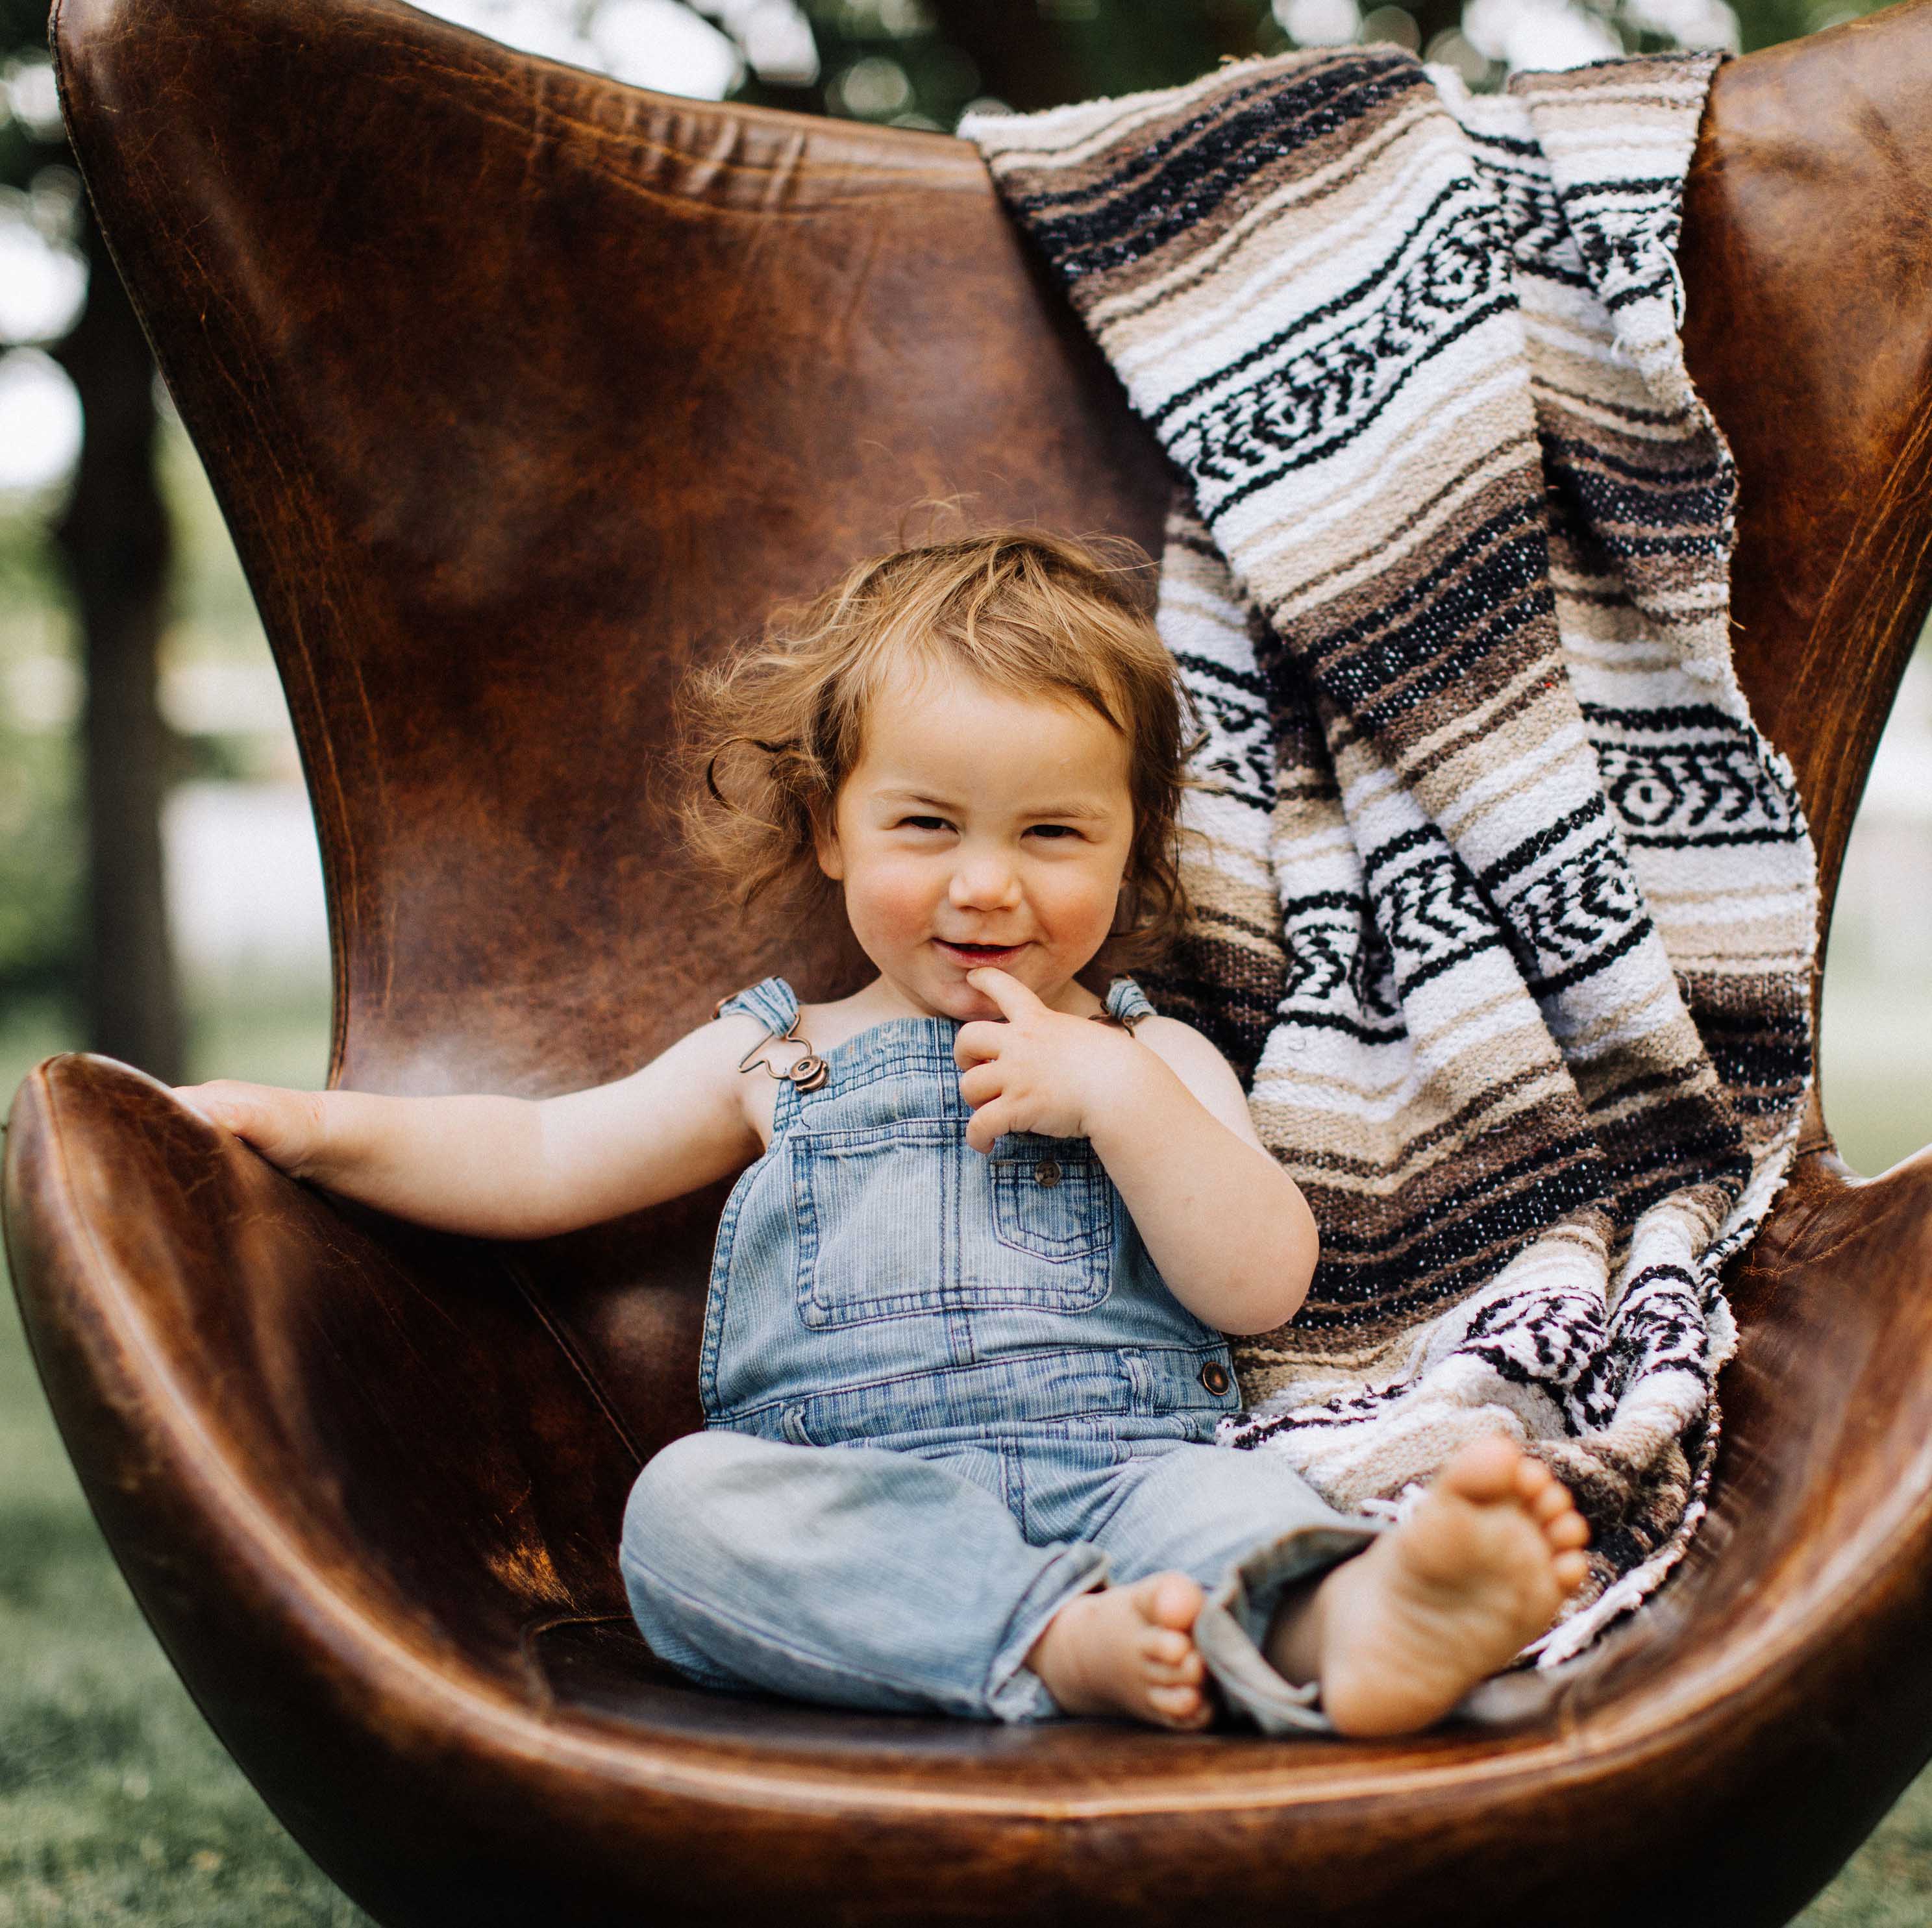
I LOVE shooting on partly cloudy days! Anytime the sun is filtered through soft, white clouds, there is a little extra “glow” to skin tones. You can even face your subject towards the sun and get a great catchlight in their eyes without the harsh lines direct sunlight normally provides.
This picture shows what a huge difference a few clouds can make with lighting! With the sunlight filtered through clouds, I pointed my son towards the light because it was soft. This not only gave a catchlight in his eyes, but lit up his whole body in silky smooth light.
One minute later the cloud moved, and you can see the difference in the photo from tip #2. It’s harsher with more contrast and vibrant colors, and deep shadows on his face. I could have avoided this by turning the chair so that the direct sun was not hitting his skin at all.
Things to Avoid
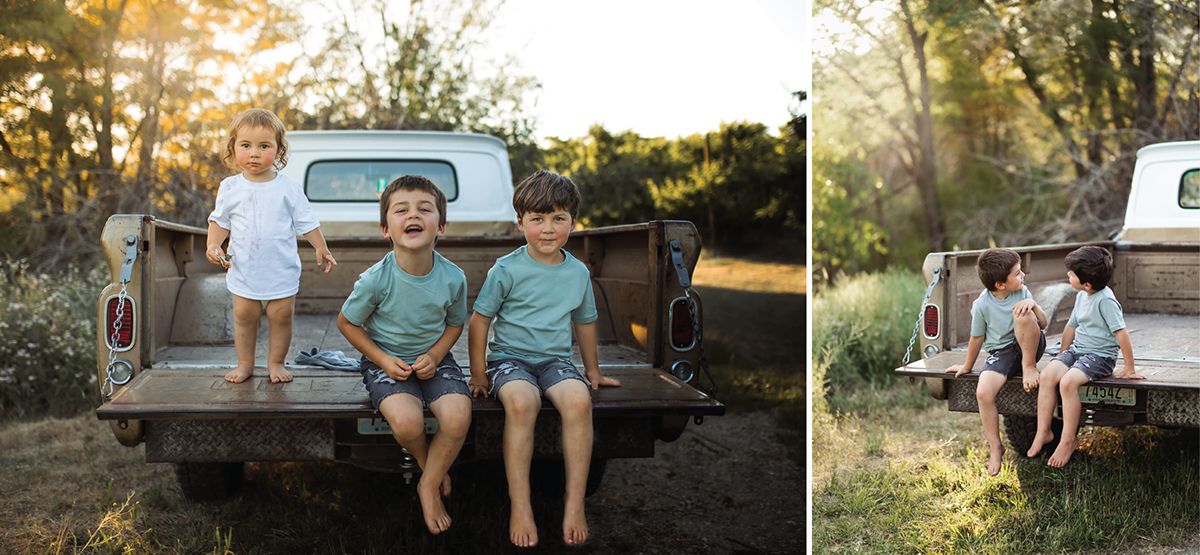
When you’re outside and your cubs are in the shade, it can be easy to be happy with the light on their skin and totally forget to look at the background. If there is shade on your kids and bright light on your background, it will be blown out and possibly even a big blob of white (I’m SO guilty of this!)
Take these pictures, for example. It has a big patch of white sky sticking out like a sore thumb, even though the boys are nicely shaded. There is also a strip of grass next to the truck that is lit up and is distracting from their sweet faces. I still love the photo because it has all three of them and their faces are priceless, but if I had been paying better attention to the light in the moment, I would have moved the truck to be angled so that my background was trees all the way across. The final image would be more balanced and beautiful.
Instead of moving the truck, I changed my angle and caught this photo of just my older boys — you can see the difference! No crazy contrasts or oddly highlighted grass. Overall, it’s just a little easier on the eyes than the first image.
Words of Encouragement
Sometimes it’s impossible to remember all of these tips while juggling three boys, the light, camera settings, and whatever activity we’ve got going on, all while trying to stay present in the moment. Photoshoots at my house are usually pretty quick and wild! Practicing over the years has helped a lot of these things become automatic for me so I don’t have to think about them like I used to. Please don’t give up if your first shoot (or two or three) don’t turn out like you had hoped! Keeping things quick and fun will help this become something that everyone looks forward to rather than a stressful, high-pressure situation.
If you feel overwhelmed by this topic, just pick one thing to focus on today. Find a window in your house and pay attention to the light as it changes throughout the day. Write down a time you think would be great for a portrait. Stick one of your cubs close to the window during a time with soft filtered light, and maybe even give them a sucker for being a good sport while you practice.

A good place to start when you are trying to master light, is simply to notice it. Start looking at your surroundings and your cubs and watch how the light falls on them. What does it cast in shadow? Are the shadows gradual or abrupt? Is it warm, soft, harsh, drastic? What is it doing to the colors? Noticing light is something you can do any time, anywhere.
Need some extra help? Download this free PDF worksheet with that will help you understand the light in your home and help you on your journey towards becoming your own family photographer.

[…] Remember how important light is? Now’s your chance to put what you learned into practice! Is your location inside? Is there a […]